|
You don't buy an overpriced and undersized commercially available biofilter. You can easily design and make your own highly effective biofilter that out-performs what's on the market. With a bit of time, ingenuity and the information
contained here, you can save yourself a ton of money and create a biofilter better than anything found in your local pond supply store. In case you're new to this, a biofilter uses naturally occurring bacteria and micro organisms to remove toxins and harmful waste from the pond water.
The basic Nitrogen Cycle is: 1) Ammonia to Nitrite 2) Nitrite to Nitrate 3) Nitrate to Free Nitrogen Ammonia comes from fish waste and decaying organic debris. Nitrosomonas bacteria oxidize ammonia into nitrite by the addition of oxygen, and nitrobacter bacteria oxidize nitrite into nitrate. These two types of bacteria are referred to as "nitrifying bacteria," and live on surfaces in the pond, such as plant stems, rocks and especially in the biofilter. They require plenty of oxygen in order to live and to perform their function. Next, the nitrate is eliminated by "denitrifying bacteria" that live in the bottom muck. These muck dwellers are anaerobic bacteria that die in the presence of oxygen. As they convert nitrate to free nitrogen, they also release hydrogen sulfide and methane gases - that swamp smell. Most clean, well aerated ponds do not have an anaerobic environment, and nitrate accumulates in the pond. It is not as toxic to fish as are ammonia and nitrite, but it is a nitrogen fertilizer and will encourage an algae bloom. Fortunately there are formulations of bacteria that eliminate nitrate in the presence of oxygen. These bacteria can be added to the pond and thus allow the nitrogen cycle to be completed so that algae will not colonize the pond. As for the free nitrogen, put some plants in your pond or the biofilter to complete the cycle. Nitrogen is a fertilizer. A properly set-up biofilter requires very little maintenance and other than the occasional cleaning and should be self-sufficient. |
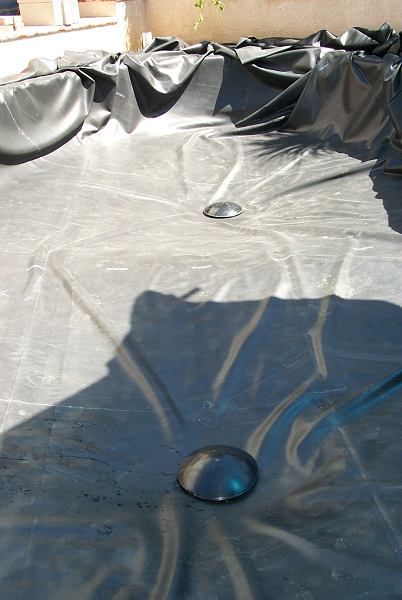
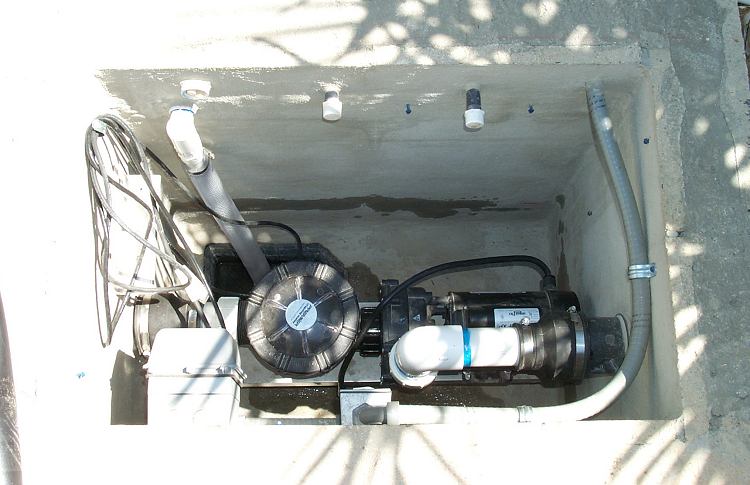
| Here is a schematic of my biofilter. It's an upflow design so if the pump fails, it won't be drained dry and immediately kill the bacteria. I'm using ABS pipe rather than PVC because long radius bends are available for ABS (and bends are the main source of water friction). The inlet is 3-inch diameter and the outlet is 4-inch. There will be an air manifold to aid in cleaning the filter. The cleaning process will be to 1) Shut off the pump 2) Open the ball valve which drains the biofilter through 1-inch PVC pipe (the drain will take the nitrogen-rich wastewater to the plants). 3) Apply compressed air from a portable tank to the manifold coupling to loosen debris. | 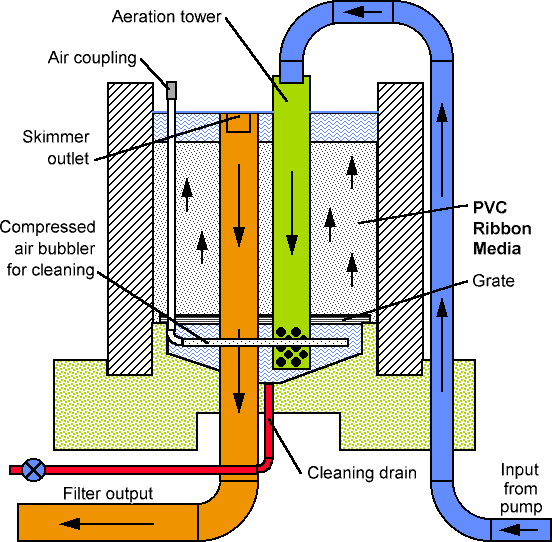 |
 |
The exterior of the filter will be stuccoed.
The interior of the biofilter has been coated with seven coats of Henrys 107
Asphalt Emulsion
and will be fiberglassed with 7.5 oz fiberglass cloth and polyester resin.
Although others have used Henrys 107 by itself, or in
combination with Yellow Jacket nylon mesh, Henrys'
Data Sheet
says the product is for dampproofing, not waterproofing.
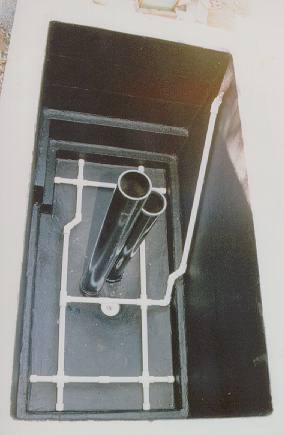
Here's a picture of the interior of the biofilter showing the 1-inch PVC pipe cleaning manifold, the drain, the aeration tower, and the output pipe. |
|
This is the interior of the boifilter filled with about 8 inches of water.
A small 1/2 horsepower air compressor has been connected via a quick-release
fitting and bubbles are coming out of the manifold. The theory is that the
bubbles will dislodge debris from the media and will flow out with the waste
water, thus requiring less frequent cleaning.
During the weekly cleaning, I may choose to use a portable air tank rather than an air compressor. |
 |
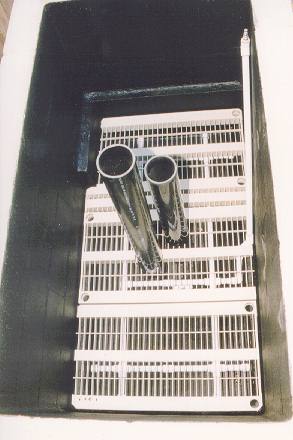 |
This is the grating that supports the biofilter media. The grate sits on a two-inch
concrete rim that is cast into the biofilter. I originally planned to use expanded
stainless steel for the grating material but found the cost to be $150 and the cutting
would be very time consuming. I found some inexpensive plastic shelving units for
$29 at Home Depot. I cut three shelves (and a small piece of a fourth) to fit on
the concrete rim. They are very strong and they can easily support my weight.
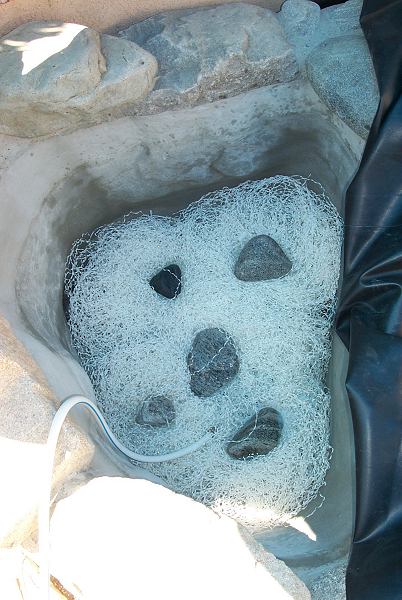
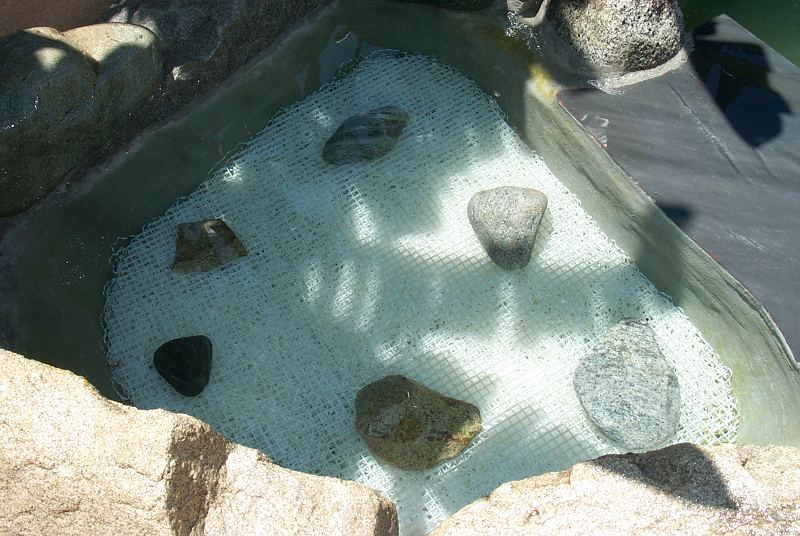
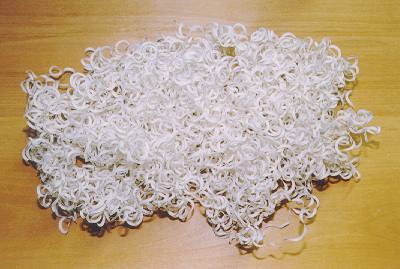
Fiberglass screen door material was later added on top of the grate to prevent the biofilter media from falling through. While I preferred to use a light-weight filter media, there was no way I was paying $1000 for it. Lava rock is cheap, but it clogs easily and is difficult to remove. I viewed Aquatic Eco-System's page on boifilter media and liked the idea of PVC ribbon (which they call Bio-Fill). I investigated further and corresponded with folks that had good luck with PVC ribbon and had used lava rock in the past. |
| I decided to make the PVC ribbon myself. I called a local supplier of industrial plastics and was shocked to learn that their 2.5 or 3 inch diameter PVC rod cost SIX TIMES as much (by weight or material volume) as common 3/4-inch Schedule 40 PVC sprinkler pipe sold at Home Depot. The pipe measures .820 inch inside diameter with a wall thickness of .115 inch. Note that no dimension of 3/4 inch sprinkler pipe measures 3/4 inch. |
|
|
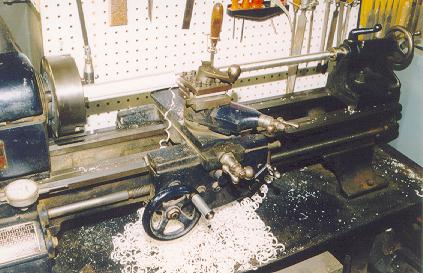
I made a 2-foot long spindle out of aluminum with an diameter of .815 inch.
I cut the sprinkler pipe into 2-foot sections and placed the pipe over the
spindle. One end was chucked into the lathe chuck (did I mention that I have a
machine shop in my garage?) and the other end on a live center in the tailstock.
I set the depth of the cut to .115 inch to remove all the pipe in one pass,
leaving only the spindle.
I adjusted the feed for 100 threads per inch which produced .010 inch thick by .115 inch wide ribbon. You can run the lathe at any speed but at slower speeds the PVC ribbon won't wrap around the spindle and can be collected at the end of the 22-inch cut. A 10-foot section of pipe costs $1.18 and makes over one cubic foot of ribbon (275 feet long with a surface area of 760 square inches). It takes about 30 minutes to turn a 10-foot length of pipe into ribbon. |
|
When my biofilter is fully operational (and fish aren't swimming in it), it will
require one cubic yard (27 cubic feet or 200 gallons) of media. Aquatic Eco-Systems
would charge $600, plus shipping, for the required material. The total cost to me
was $32 and a few evenings.
I really don't feel like making biofilter ribbon as a side-job so don't ask. No, you shouldn't use a wood lathe. I think that the plastic carton strapping material may also work. Especially if it has a strong texture. |
|
|
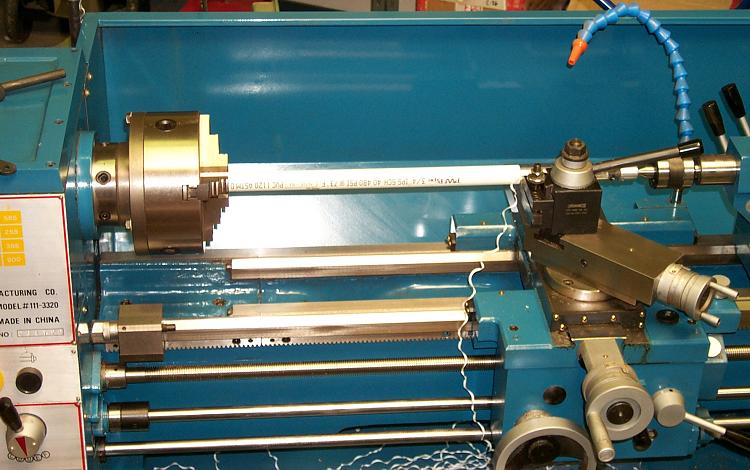
Same operation of making PVC ribbon on a modern metal lathe running at 500 RPM. The ribbon must be gathered
by hand so it doesn't wind around the spindle. Yes, those are two different lathes, and I have a third lathe in Maui. I am truly blessed. |
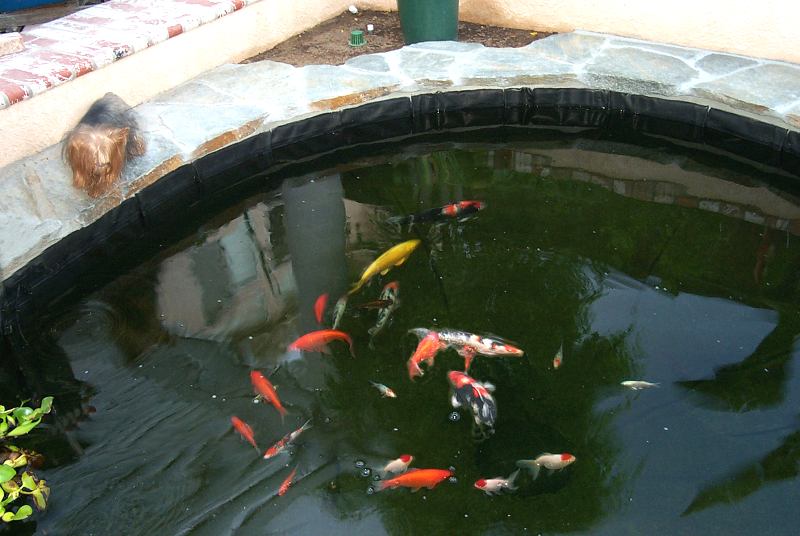
| Before the Koi pond was built, I had the biofilter about 25% filled with the PVC ribbon, which is covered with a filter mat. The biofilter was being used as a 300-gallon aboveground pond and a home to twelve Koi. A 350 gallon / hour submersible pump was used temporarily to pump water into the aeration tower and to a small fountain. Aeration was also supplied by a dual-output air pump and two air stones. The fountain is shut off during cold weather (we're in Southern California). The biofilter was seeded from my half-barrel pond gravel and I never had an ammonia spike, although after 6 - 8 weeks of operation, the nitrites spiked to 2 PPM. | 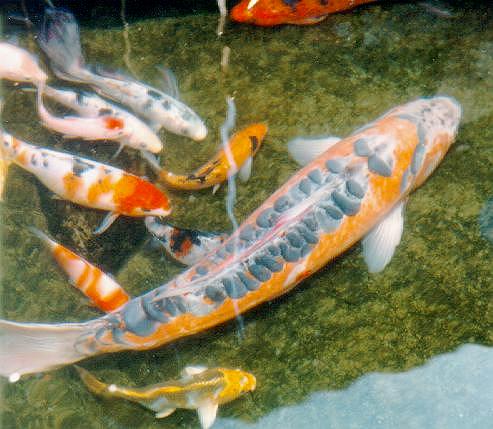 |
| I salted the water and placed a homemade canister in-line with the fountain. The canister held one pound of activated charcoal, which brought the nitrites down to 0 PPM within 24 hours. After a month, the charcoal filter was no longer required and since that time the ammonia and nitrites always measure 0 PPM. | |
|
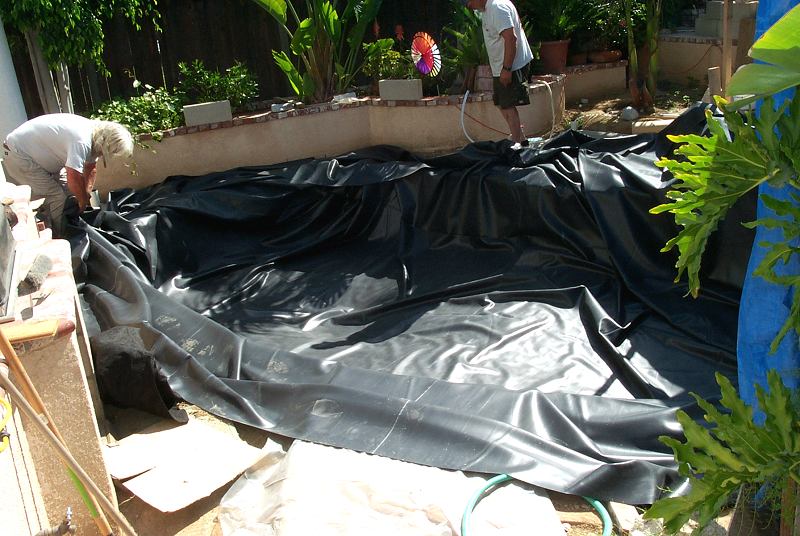
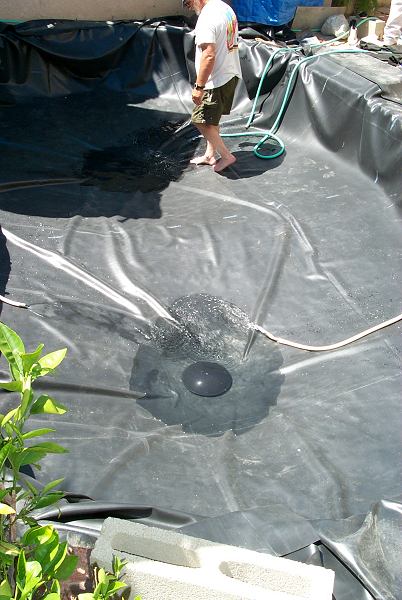
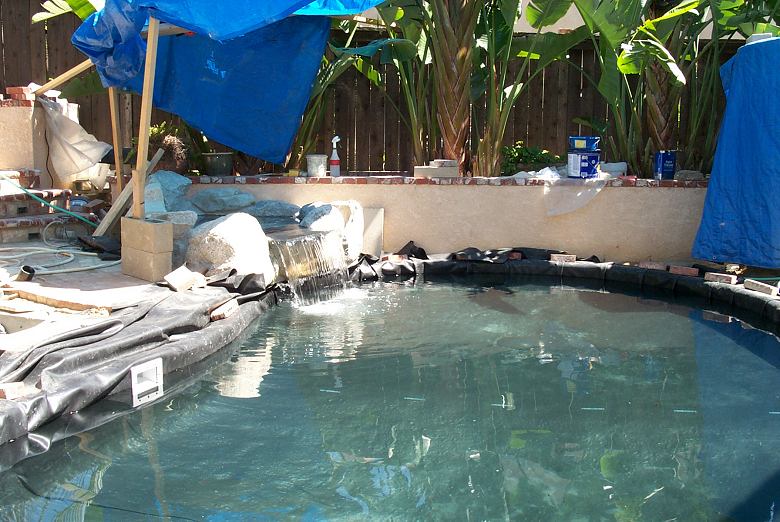
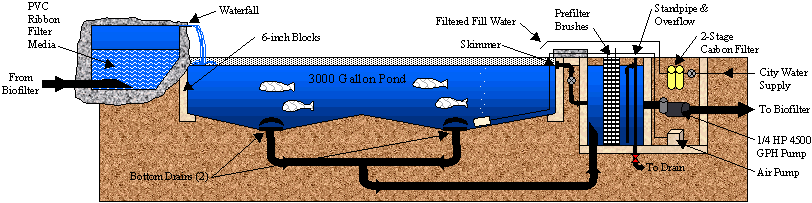
In June of 2001 the 20' x 30' 60-Mil EPDM pond liner arrived from Anjon Pond Liners.
The bottom of the pond had been coated with 1 1/2 inches of decomposed granite,
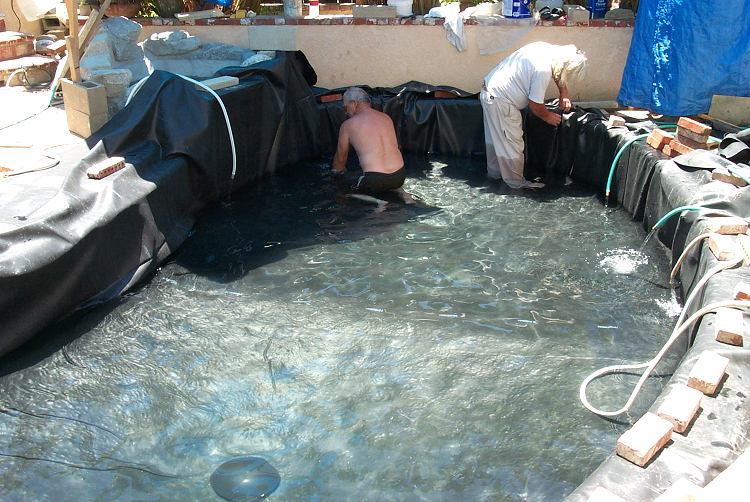
and the sides were steel reinforced cement block, so no padding was placed down before laying out the EPDM.
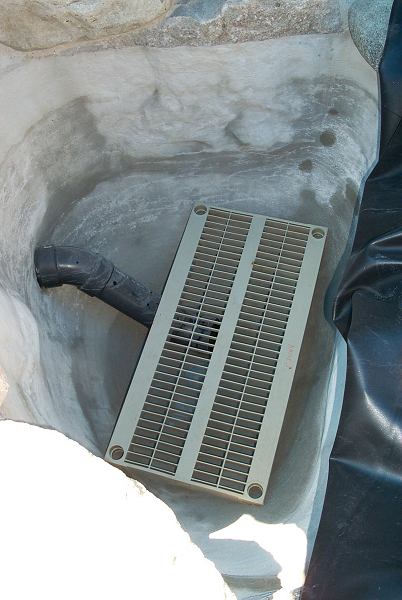
Two bottom drains were installed and after waiting 40 minutes for the silicone to cure, the filling began.
We used five garden hoses including one from the neighbors.
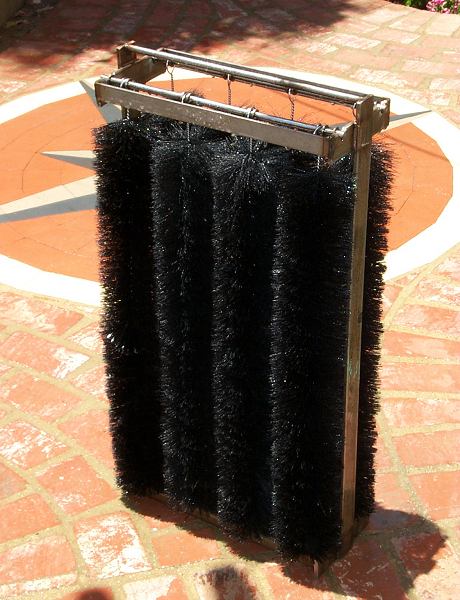
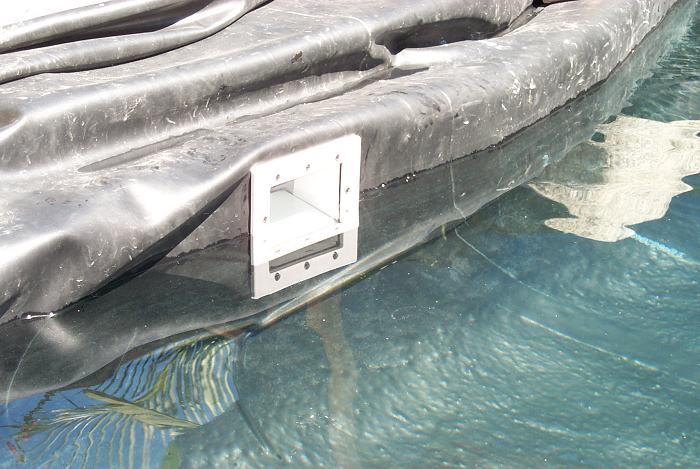
The skimmer that was purchased at a pool supply store was installed in the side adjacent to the brush pre-filter cavity.
Once the water reached the proper level, power was applied to the 4500 GPH pump and the waterfall came alive.
Usually waterfalls require some tweaking but this one was nearly perfect the first try.
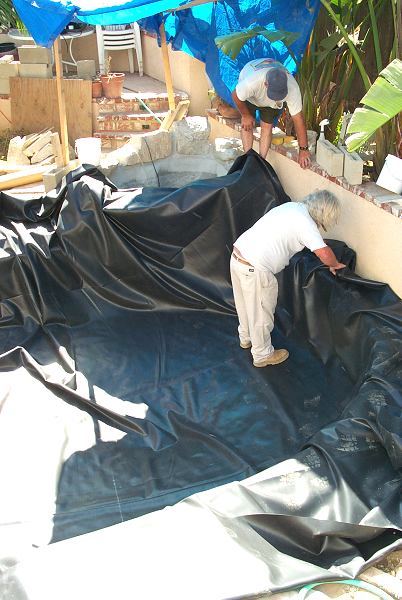
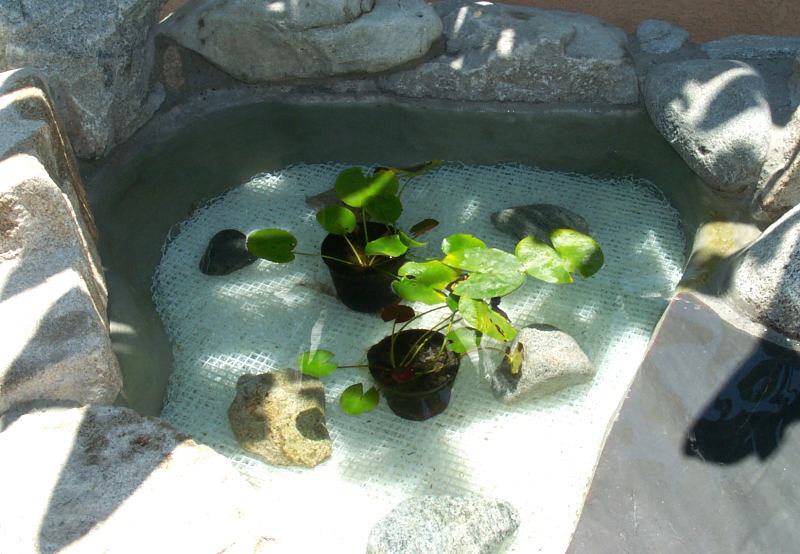
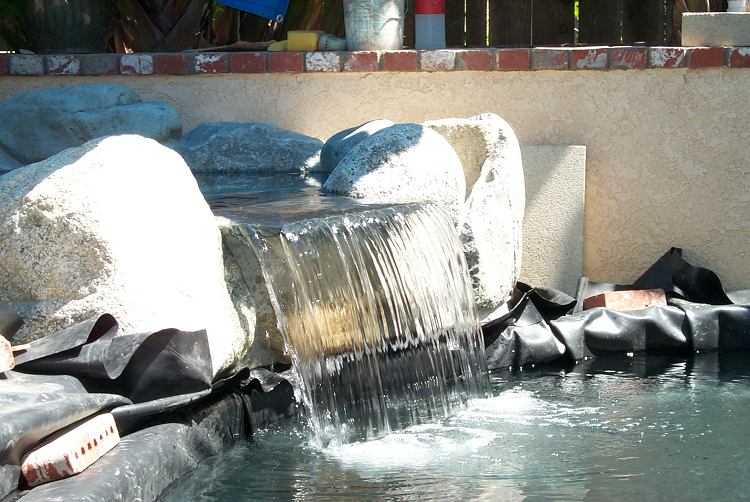
A few notes may reduce confusion for the careful reader: First, there are TWO biofilters. While the pond and patio were being built, the Koi lived in the top biofilter. No Koi were to be added to the pond until the water sat one week and the pond was drained and refilled. Obviously, a dechlorinating agent would be used on the final fill. In the interim, the Koi continue to live temporarily in their top biofilter. Not shown in the Pond Schematic, there is a Wye fitting and a valve that diverts the output of the pump into the bottom of the waterfall. This valve was opened so the water circulated without the top biofilter. In case you're wondering why there are two boifilters, it's because two 300 gallon biofilters work considerably better than one large 600+ gallon biofilter. In a stable pond, the biofilter actually uses several times more oxygen than the Koi consume, so providing oxygen-rich water to the biofilter is essential. Both the top and waterfall biofilters are upflow designs and both use homemade PVC ribbon media. The top biofilter provides oxygenation both before and after via two oxygenating towers. The waterfall oxygenates the water for the pond via the 18-inch drop. |
|
|
|
|
|
|
|
|
|
|
|
|
Links:
Jeff's Pond Page |
 Grants of Dalvey Fine Engravable Gifts |